
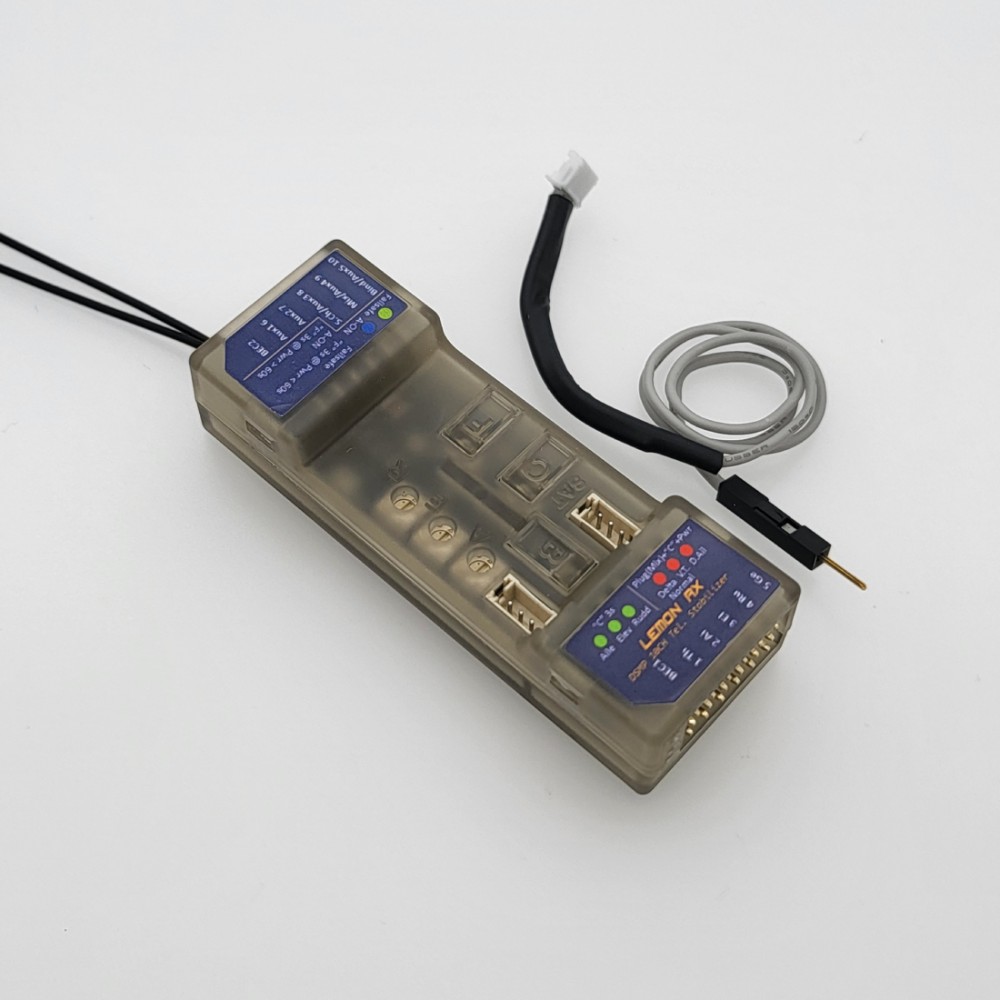
Lemon RX DSMP 10-CH TELEMETRY STABILIZER & VOLTAGE PROBE (DSMX/DSM2 COMPATIBLE)
Lemon RX DSMP 10-CH TELEMETRY STABILIZER & VOLTAGE PROBE (DSMX/DSM2 COMPATIBLE) Product Specifications
Highlight The generation 2 DSMP 10-channel telemetry stabilizer is a complete redesign that provides the ultimate reliability, features and performance.
User manual - See www.lemon-rx.com/manual Reset stabilizer
Bind with bind plug
Bind without bind plug
Bind with a satellite without a bind plug
Failsafe
Stabilization activation switch
Wing Mode and Dual Aileron
Gyro direction
V/I sensor calibration
V/I probe calibration
Gain setting - Adjust via the 3 dials or real-time master gain on channel 8 depending on the transmitter channel's availability. View setting LEDs with all on - Press the C button briefly (no more than 2 seconds). |

XQ 4013 digital 6v
| Description:
Don't forget to buy some circle servo arms to fit your carbon fiber arms you got in your kit! |


X-4013
$42.50

DLE 20cc Engine
| + Free Shipping (Continental US only!) If international customer, please contact us for shipping quote. You will be charged separately for shipping.
Description:
|


DLE-20
$249.99

SmartDesign V3 "Trouble Free" Tail Wheel Assembly
|
Description: This tail wheel assembly is extremely efficient and reliable. With fewer parts, there is less to worry about and the solid construction makes it the go-to choice for pilots at any skill level. The new V2 design incorporates ball bearings for smooth motion, ball-joint to rudder steering connection, wider CF mounting plate, and slightly larger wheels that the v1. "Trouble Free" means just that... no more worrying about screws falling out or loss of control. Make the switch today by installing the SmartDesign Tail Wheel!!! CNC Aluminum & C.F. Tail Wheel Assembly for 20cc to 220cc
Features:
Pricing
Weight
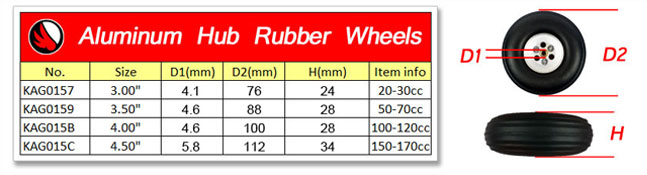
Don't forget to check out our Aluminum Hub Wheels! They are excellent replacements for landing gears and tail wheels. Please see sizing chart below.
|
GW-KAGC-112
$54.99