
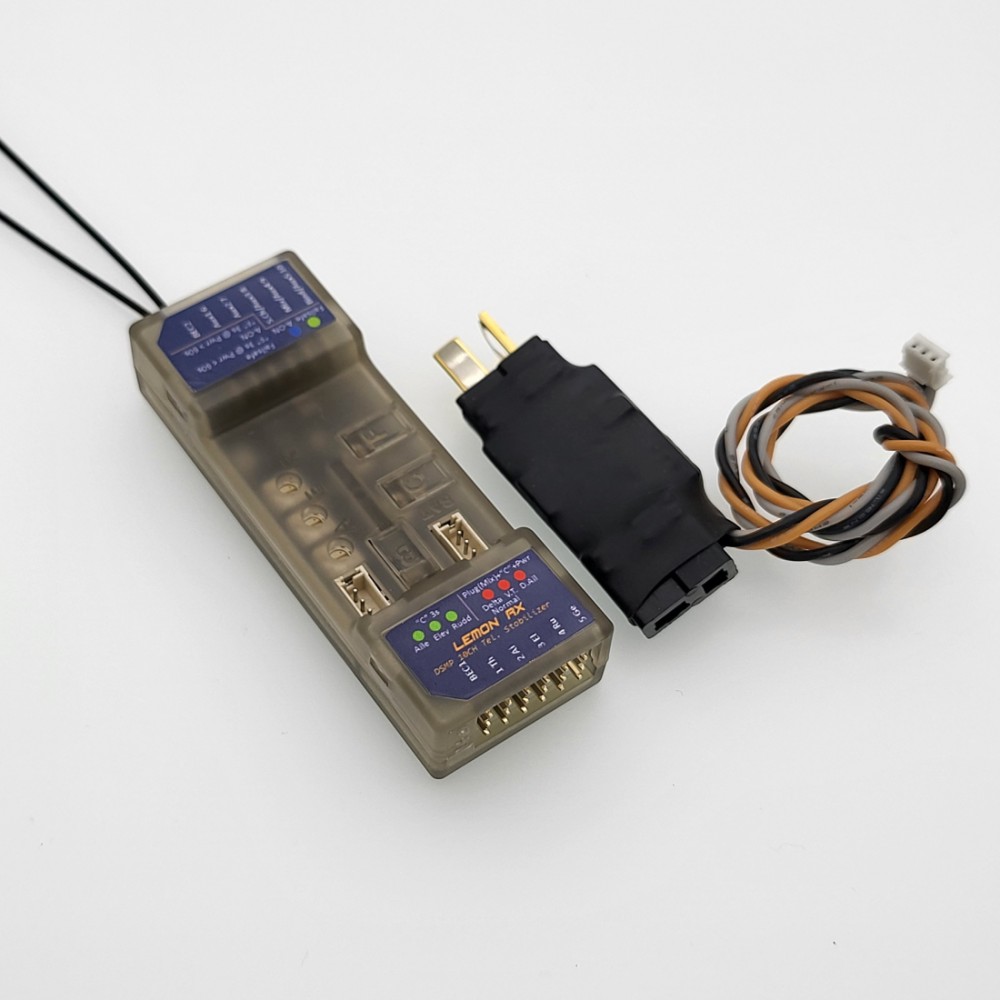
Lemon RX DSMP 10-CH TELEMETRY STABILIZER & T-PLUG ENERGY METER (DSMX/DSM2 COMPATIBLE)
Lemon RX DSMP 10-CH TELEMETRY STABILIZER & T-PLUG ENERGY METER (DSMX/DSM2 COMPATIBLE) Product Specifications
Highlight The generation 2 DSMP 10-channel telemetry stabilizer is a complete redesign that provides the ultimate reliability, features and performance.
User manual - See www.lemon-rx.com/manual Reset stabilizer
Bind with bind plug
Bind without bind plug
Bind with a satellite without a bind plug
Failsafe
Stabilization activation switch
Wing Mode and Dual Aileron
Gyro direction
V/I sensor calibration
V/I probe calibration
Gain setting - Adjust via the 3 dials or real-time master gain on channel 8 depending on the transmitter channel's availability. View setting LEDs with all on - Press the C button briefly (no more than 2 seconds). |
 w/ Flaps Plus Floats & Rubber Wheels")
Dynam DHC-2 Beaver V2 Yellow 4S Sea/Land Float Plane 1.5m (59") w/ Flaps Plus Floats & Rubber Wheels
| Dynam DHC-2 Beaver V2 Red 4S Sea/Land RC Float Plane 1.5m w/ Flaps Plus Floats & Rubber Wheel *Free shipping is for continental US only RedwingRC Plug-and-Play aircraft! Attention scale seaplane enthusiast!!! The Dynam Beaver is a must have because of its ease of flight, scale appearance, and durability. This seaplane has incredible flight at slow speeds because of its perfected design. The Dynam Beaver comes with a pre-painted finish from the factory and even includes pre-installed LEDs!!! We recommend a LED driver to really get the LEDS to shine bright, a LED driver must be installed to maximize the full potential of the LEDS. Hey don't worry, the Dynam Beaver wont only land on water. Landing gears are included so you have the option of installing the floats or the landing gear with wheels. The Dynam Beaver is flap ready. The wings have the cutouts for the servos and hinges. You will need to supply the servos and servo reverse (if your radio does not have this feature) Build time is around 45- 60 min from box to air. Expect flight time to be from 8-15 minutes, but all depends how fast you fly.
Key Features:
Specifications:
|
DY8961-beaver yellow
$249.00
")
BLS-H71B HELICAL GEAR, HV-DIGITAL, ULTRA MEGA TORQUE, HIGH SPEED, BRUSHLESS +Servo Arm (73.2kg/1016.7oz 0.08sec @8.4V)
BLS-H71B HELICAL GEAR, HV-DIGITAL, ULTRA MEGA TORQUE, HIGH SPEED, BRUSHLESS |
BBR-BLS-H71B
$159.99
 for Water Cooled Model")
SCORPION COMMANDER 15V 110A ESC SBEC (V3) for Water Cooled Model
| SCORPION COMMANDER 15V 110A ESC SBEC (V3) for Water Cooled Model |
ESC-42-110-SBEC-V3-water
$123.99