
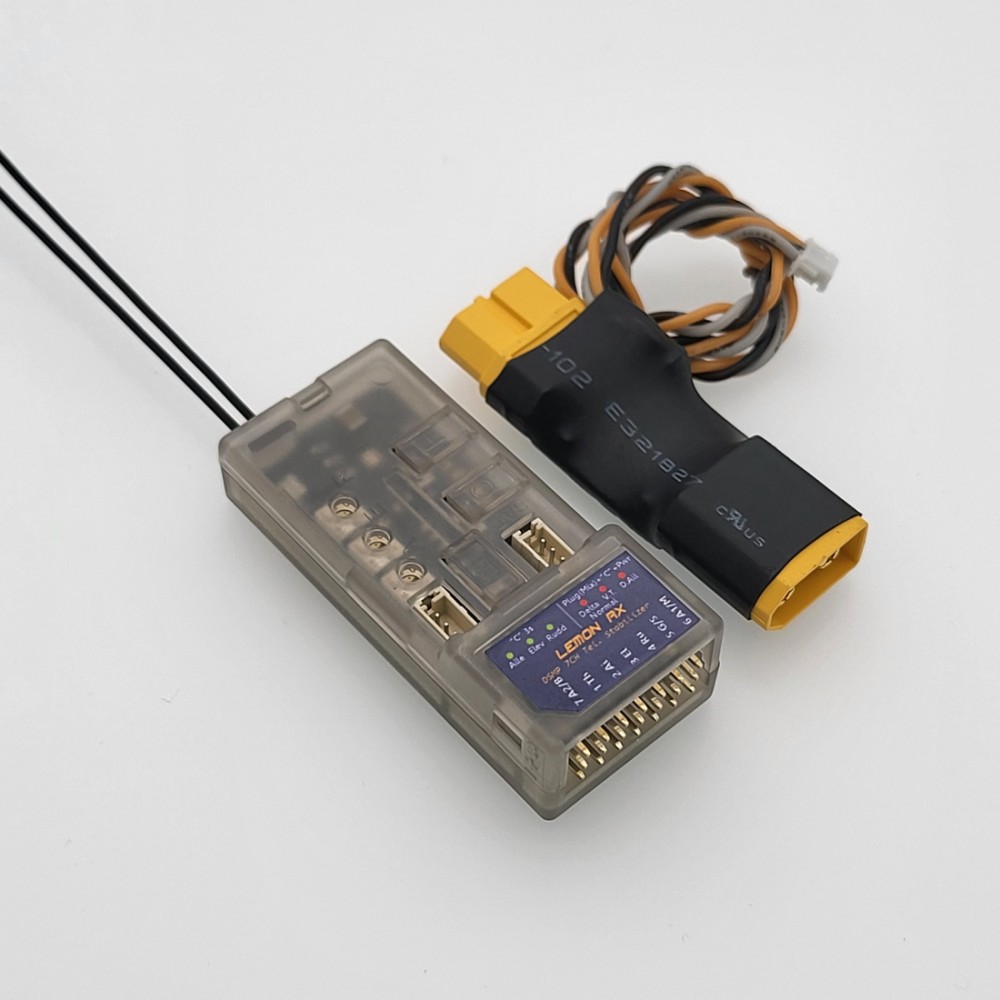
Lemon RX DSMP 7-CH TELEMETRY STABILIZER & XT60 ENERGY METER (DSMX/DSM2 COMPATIBLE)
Lemon RX DSMP 7-CH TELEMETRY STABILIZER & XT60 ENERGY METER (DSMX/DSM2 COMPATIBLE) Product Specifications
Highlight The generation 2 DSMP 7-channel telemetry stabilizer is a complete redesign that provides the ultimate reliability, features and performance.
User manual - See www.lemon-rx.com/manual Reset stabilizer
Bind with bind plug
Bind without bind plug
Bind with a satellite without a bind plug
Failsafe
Stabilization activation switch
Wing Mode and Dual Aileron
Gyro direction
V/I sensor calibration
V/I probe calibration
Gain setting - Adjust via the 3 dials or real-time master gain on channel 8 depending on the transmitter channel's availability. View setting LEDs with all on - Press the C button briefly (no more than 2 seconds). |

Foam Tape
|
Description:Bob Smith Industries CA Glue Super-Gold+™ Odorless, CASUPER-GOLD™ and SUPER-GOLD+™ are our odorless INSTA-CURE CAs They are non-frosting and take only 2 or 3 seconds longer to bond. There are no fumes that irritate the nose and eyes. The SUPER-GOLD™’s do not attack white foam; therefore, they can be used in the building of foam core wings and the assembly and repair of plastic and foam ARF’s. They will not fog clear plastic. SUPER-GOLD+™ is ideal for attaching clear canopies in plastic model kits; however, MAXI-CURE™ is still recommended for assembling the rest of plastic kits. Wood can be bonded to white foam with SUPER-GOLD +™ in less than fifteen seconds. For bonding foam to foam, spray a very light fog of INSTA-SET™ to one piece and apply SUPER-GOLD+™ to the other before joining. Excess INSTA-SET™ may create too much heat, which can melt the foam. Both SUPER-GOLD™’s cure to a more flexible consistency for better shock absorbtion. Whenever a large amount of CA is to be used in such applications as saturating fiberglass or Kevlar, SUPER-GOLD™ eliminates the irritating fumes from the evaporating monomer that make repeated use of CA unpleasant at times.
Works Best On:
Works Good On:
Avaliable in 2oz and 3/4 Pocket Size. Pocket CAs feature a new top that has a pin built into the cap that covers the nozzle. This pin seals the bottle so that if it is tipped over, the bottle will not leak. This makes the Pocket CAs ideal for keeping in your tool or field box, just like our IC-Gel. One disadvantage that the new Pocket CA top has is the bluntness of the nozzle. This makes it more difficult to apply small amounts of the CA, especially in tight places. From the feedback we have received, it appears about 25-30% of users prefer the new Pocket CA top, which means that over 70% prefer our standard top for general bonding purposes. Most users are buying both types. Our original top for the workshop, and the Pocket CA for use out in the field. The 3/4 oz. Pocket CAs are available in BSI's Insta-Cure, Insta-Cure+, Maxi-Cure and Super-Gold+. BSI's new extender tip #304 works on the Pocket CA.
|
DUB9163
$3.99

Booma RC Wallaby Switch II with Active Dual Battery Redundancy and Voltage Monitoring
Description:
If you want a switch that offers complete dual battery balancing and redundancy with an ultra-small footprint for your scale model then look no further. The new Booma RC intelligent redundant battery balancing switch is the answer. This switch works with any single or dual battery system. Works with battery chemistry and voltage range from 2.5v to 28v. It comes with a Pin Flag and Ultra Bright Blue LED which can be mounted discretely on your scale model. The Pin Flag controls the internally mounted switch and battery redundancy circuit. The result - beautiful scale appearance with dual battery redundancy peace of mind. This new balancing technology offers zero voltage drop battery balancing and redundancy which means it can handle huge loads without generating heat. This also means your receiver and servos get all the power unlike conventional battery balancing which loses precious power as heat. Package Includes:
Specs:
|
BRC-163-JR
$59.00
 Wingspan Balsa Wood Pre-Built ARF Kit or PNP")
Savage Bobber STOL 39.4" (1000mm) Wingspan Balsa Wood Pre-Built ARF Kit or PNP
| Savage Bobber 39.4" (1000mm) Wingspan Balsa Wood Pre-Built ARF-PNP |
DW-SCG3804-Bobber
$169.99