
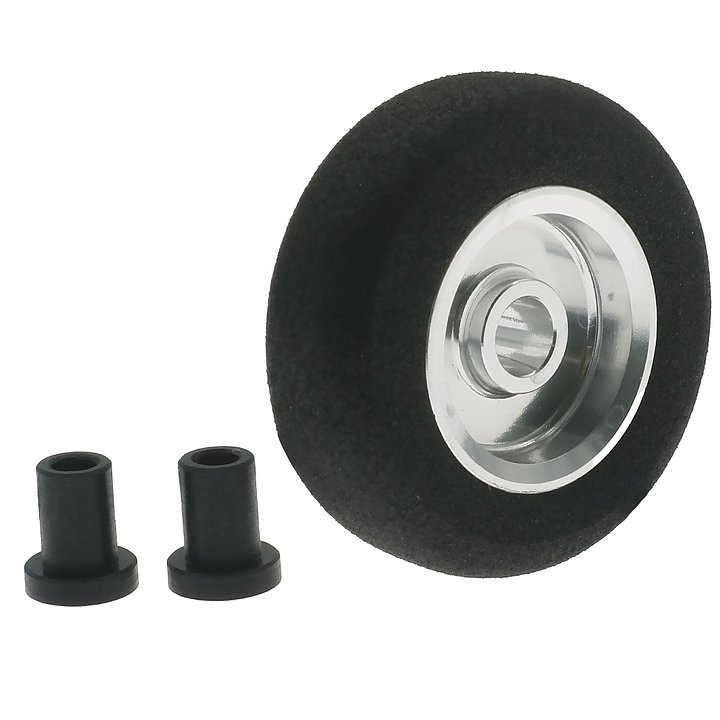
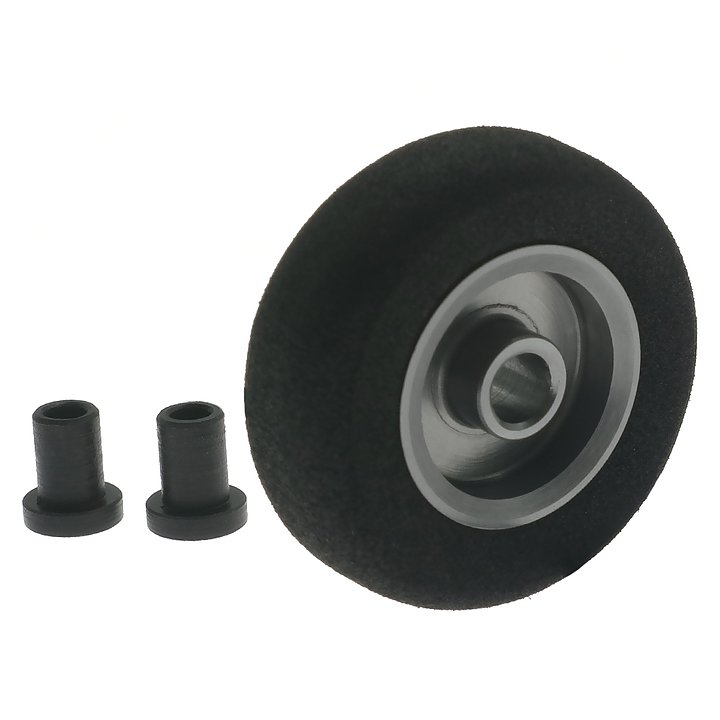
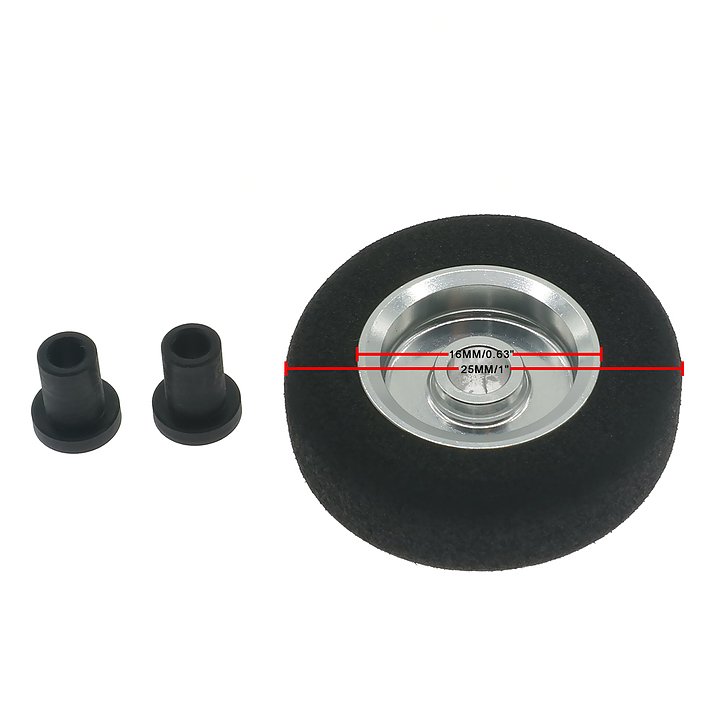
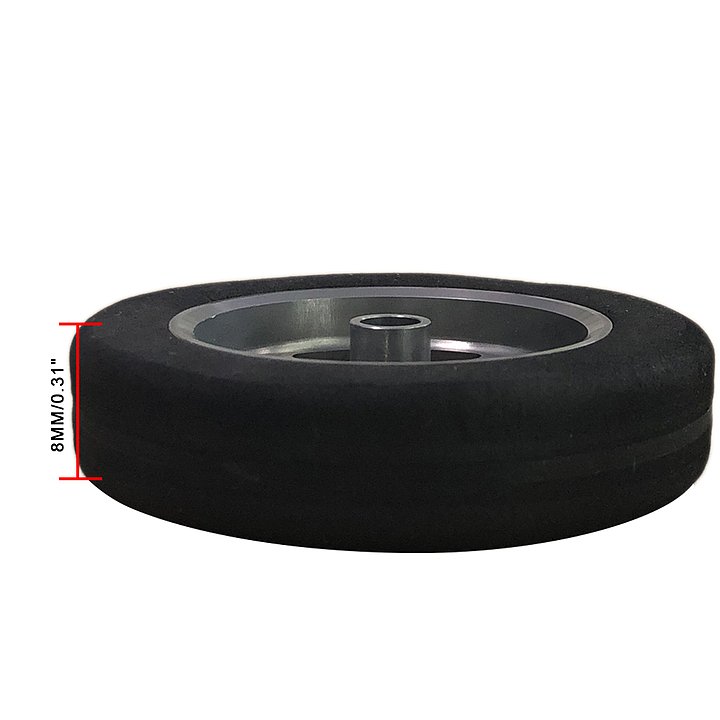
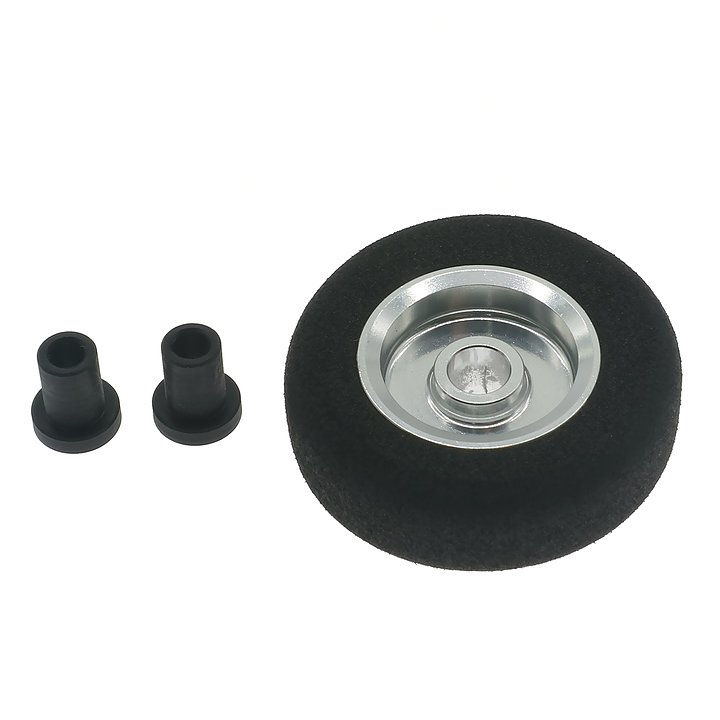
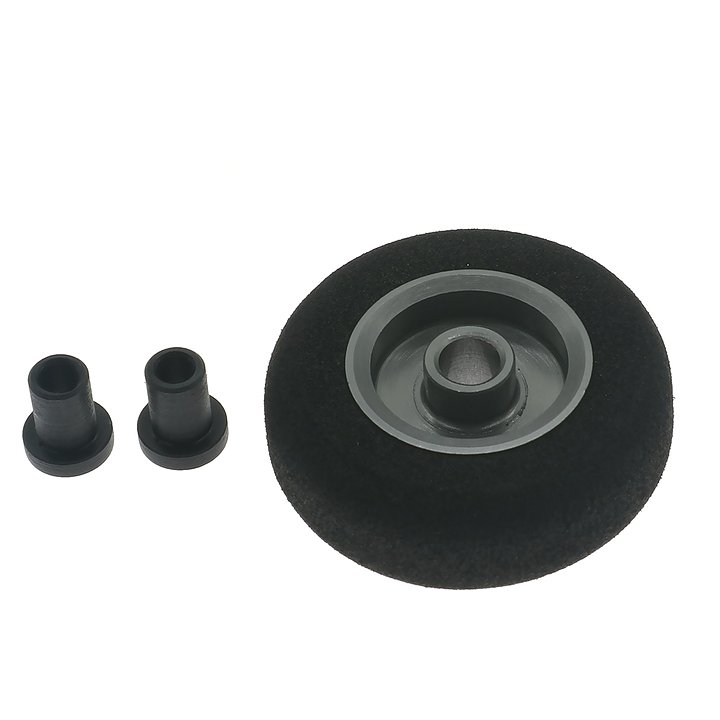
FlyWheelz Alu Hub Light Foam Wheel 1.0"/2.54cm
FlyWheelz Alu Hub Light Foam Wheel 1.0"/2.54cmVery Cool CNC machined anodized aluminum wheel hub. Very light weight and versatile design with rubber layer sandwiched between light foam to maintain its shape under load. Specifications:
Package includes: 1 wheel with 2 bushings. Choose Silver or Titanium color.
|
")
Lemon RX DSMP 7-CH RECEIVER (DSMX/DSM2 COMPATIBLE)
| Lemon RX DSMP 7-CH RECEIVER (DSMX/DSM2 COMPATIBLE)
Description: Lemon Rx DSMX Compatible 6-Channel Receiver + Lemon DSMX Compatible Satellite
Highlight
Setup Instruction Binding
Setting Failsafe
|

LM-0081
$21.99
")
BMS-125WV+ MICRO WIDE VOLTAGE-DIGITAL, HIGH TORQUE, CORELESS SERVO (7.1kg/98.6oz 0.09 sec @8.4V)
BMS-125WV+ MICRO WIDE VOLTAGE-DIGITAL, HIGH TORQUE, CORELESS SERVO (Upgraded) |
BBR-BMS-125WV+
$27.99

Vorza S Flux Buggy, 1/8 Scale 4WD RTR Brushless w/2.4GHz Radio System, Green
| Vorza S Flux Truggy, 1/8 Scale 4WD RTR Brushless w/2.4GHz Radio System, Green |
HPI160179
$549.99