
GT Power High Power 3W Aircraft Lighting System
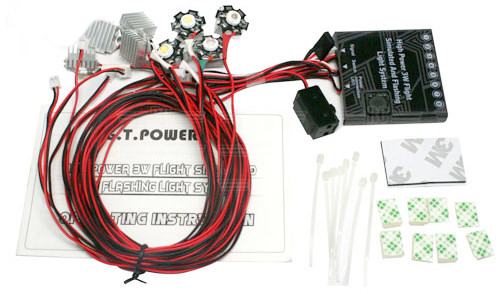
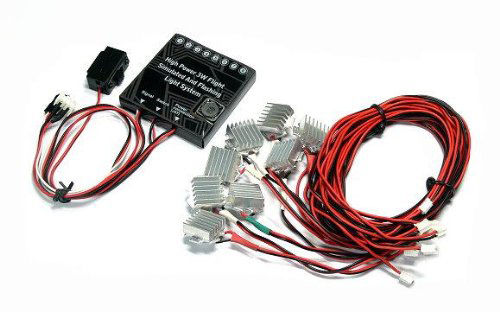
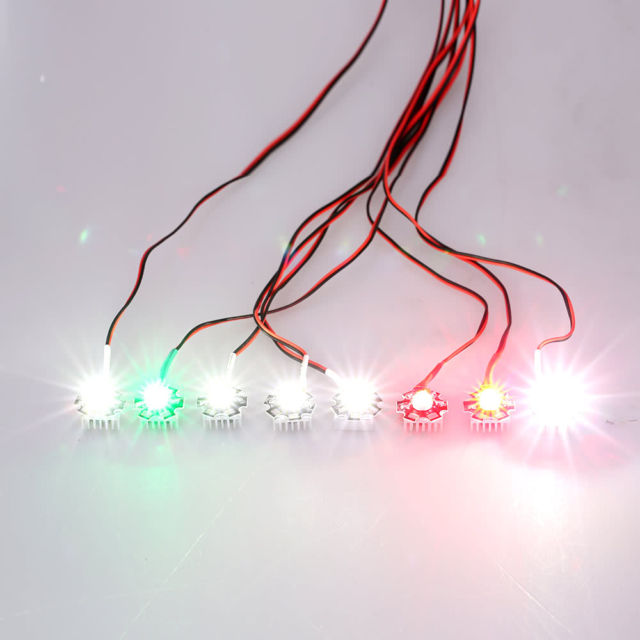
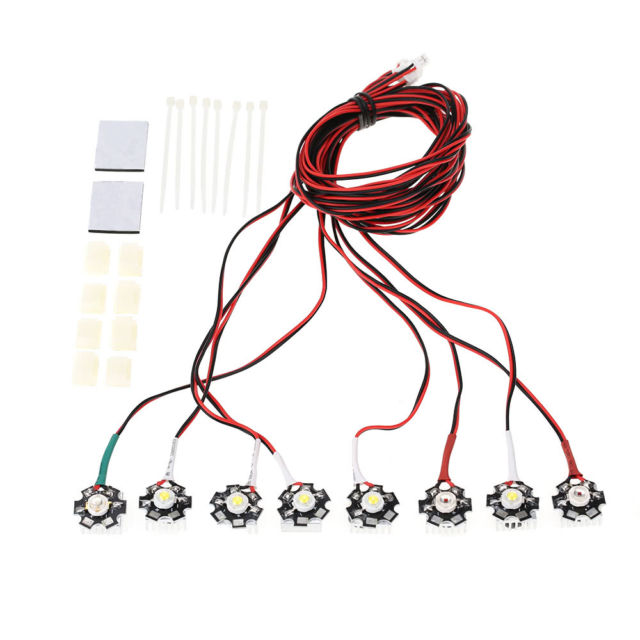
Description: GT Power High Power 3W Aircraft Lighting SystemThis lighting set is the ultimate system from GT Power and contains the brightest LEDs GT Power makes. These are seriously bright high power 3 Watt LED lights. Looking at them from a meter away will leave spots in front of your eyes. Unfortunately photographs cannot demonstrate how bright and impressive these LEDs are. The kit has a High Power control board with a Power connector wire (2S-JST), mechanical wired switched, and a Signal wire (JR) that simulates actual aircraft navigation lighting. The system has been designed according to real aircraft navigation lighting standards featuring beacon, navigation and strobe lights to make your aircraft look more realistic. A great way to add a level of scale realism to your models and it is extremely easy to install. Using long life, super-bright (3 & 5mm diameter) LEDs, you will not have any trouble seeing any model they are installed in! All LEDs or LED combinations have separate plugs so they can be moved around for different lighting combinations. The system requires a 2S Lipo with a JST balance plug. The balance connector is how the system is powered and connects to the light controller board. The kit consists of eight bright LED lights, a control board with power lead, switch, and signal lead, plus clamps and zip ties for securing the LEDs to the fuselage and wings of your aircraft, as well as double-sided tape for securing the control board within the fuselage. FEATURES:
SPECIFICATIONS:
INCLUDES:
|


FUTABA S3071HV S.Bus High Voltage Standard Airplane Servo .17sec/145.9oz @ 7.4V
|
Product DescriptionWith 4 times the resolution of its predecessor, the Aurora 9, the Aurora 9X is sure to become a favorite among the most demanding pilots. It is HiTec's first triple protocol radio which allows selection from the G1 and G2 Adaptive Frequency Hopping Spread Spectrum (AFHSS) or Secure Link (SLT) 2.4GHz technologies. It features dual processors for fast low latency response and ultra-smooth 4096 resolution. With more than 30 additional programming enhancements and new dynamically assignable switches, it is sure to thrill sport and professional level airplane and helicopter pilots alike.
Features
Standard Programming
* Capable of a Maximum of 24 rates by 8 flight conditions and 3 switch positions |
HRP-FUT01102222-3
$58.99
")
200 Meters Bulk JR High Grade 20 AWG Servo Extension Wire (Twisted Orange, Red, Brown)
| 200 Meters Bulk JR High Grade 20 AWG Servo Extension Wire (Twisted Orange, Red, Brown) High quality 22AWG wire, twisted silicone wire extensions. JR type connections, so they will plug into any receiver/switch, and most servos (Hitec/JR/PowerHD/etc etc....futaba you would have to trim the edge off).
|
EX-Bulk Ext wire
$250.00

Replacement Rubber Cap and Aluminum Starter Cone for 80-250cc ESTDT Electric Starter
| Replacementr Rubber Cap and Aluminum Starter Cone for 80-250cc ESTDT Electric Starter |
ESTDT-250cc-starter cap
$27.99